Notebook Workspace Overview
Notebook Workspaces in Syntasa transform notebooks from isolated, single-user environments into collaborative team workspaces. Instead of each user operating on a private Jupyter server, teams can now share structured environments with real-time editing, shared execution, and centralized management.
This feature enables organizations to:
- Multi-Workspace Management: Create, edit, and delete multiple independent workspaces and control access using workspace-level permissions.
- Legacy Migration: Automatically migrates all existing notebooks into a new "Default Workspace" upon upgrade.
- Workspace Isolation: Each workspace acts as a container for specific notebooks, allowing for logical grouping of analytical assets.
- Flexible Views: Toggle between Grid and List views for managing workspace assets.
- Collaboration: Collaborate in real time on the same code and data.
- Integrate notebooks directly into production workflows and runtimes.
What is a Notebook Worksapce?
A Notebook Workspace is a logical container that holds notebooks, files, configuration, and a shared JupyterLab environment. Each workspace acts as an independent collaboration zone for a specific project or team.
Workspaces can be configured as:
- Private – accessible only to the owner
- Shared – accessible to selected user groups
- Public – accessible to all users in the platform
Each workspace runs on its own shared Jupyter server instance, enabling multiple users to work together seamlessly.
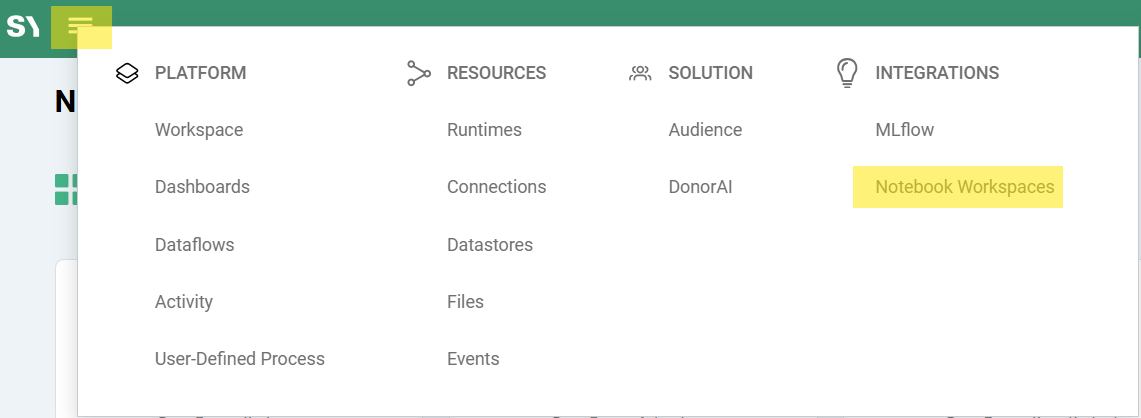
Accessing Notebook Workspaces
Menu → Integrations → Notebook Workspaces
From here, you can:
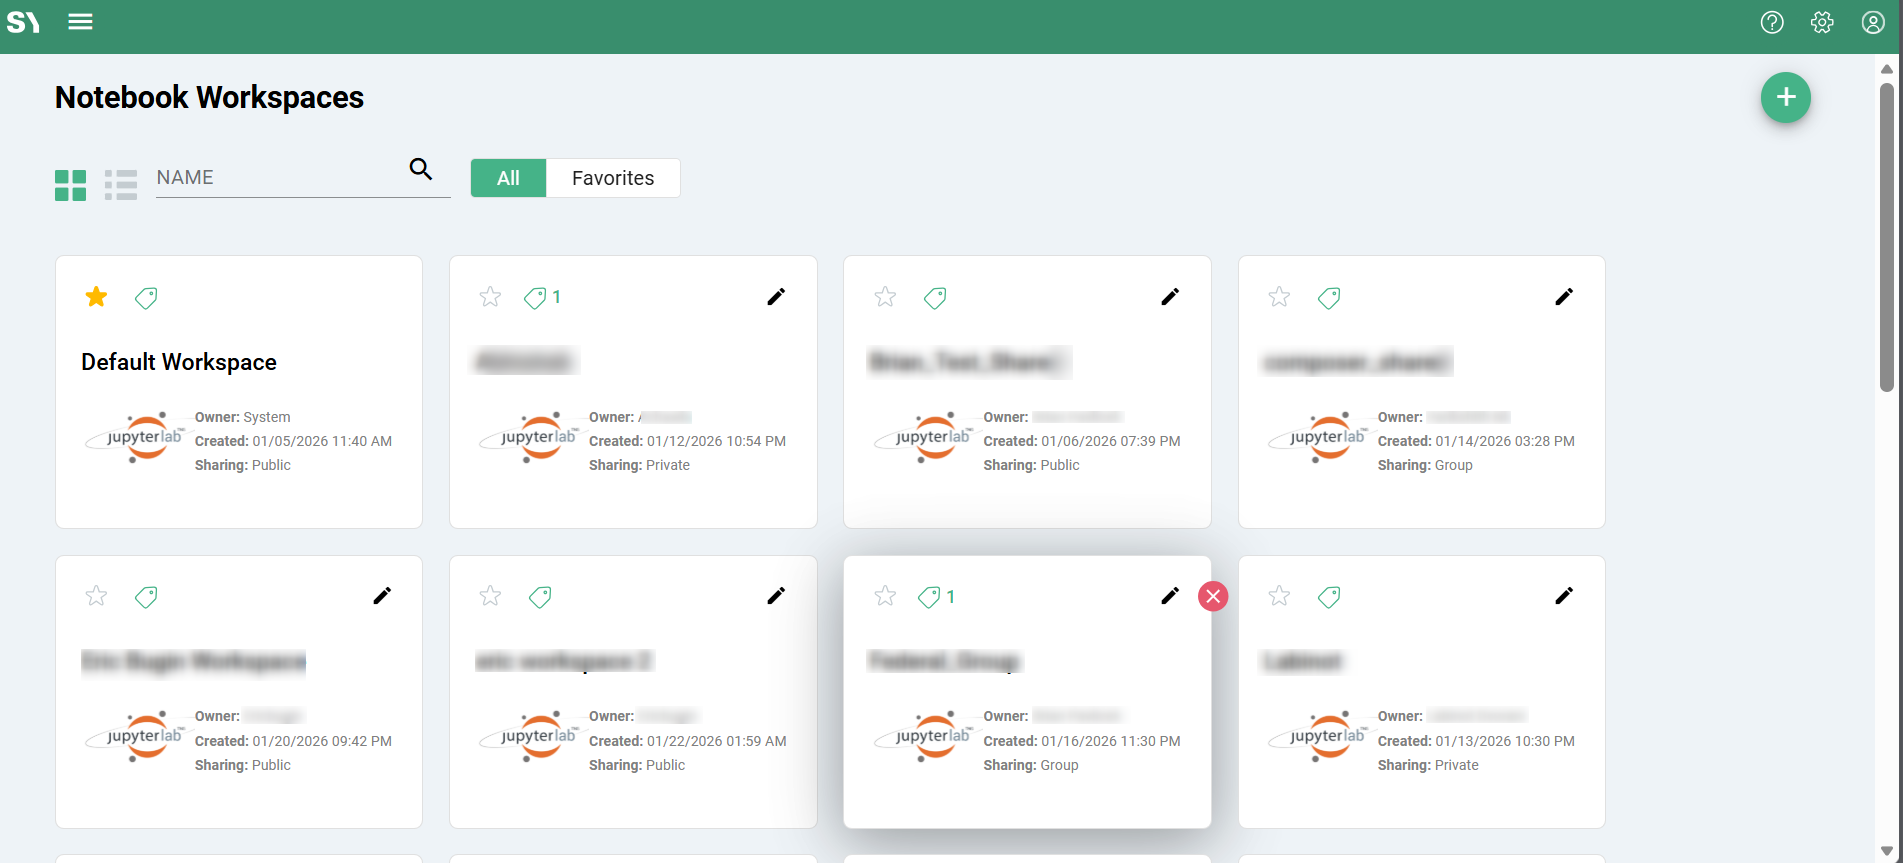
- View all available workspaces
- Filter by tags or favorites
- Switch between Card View and List View
- Launch or manage workspaces
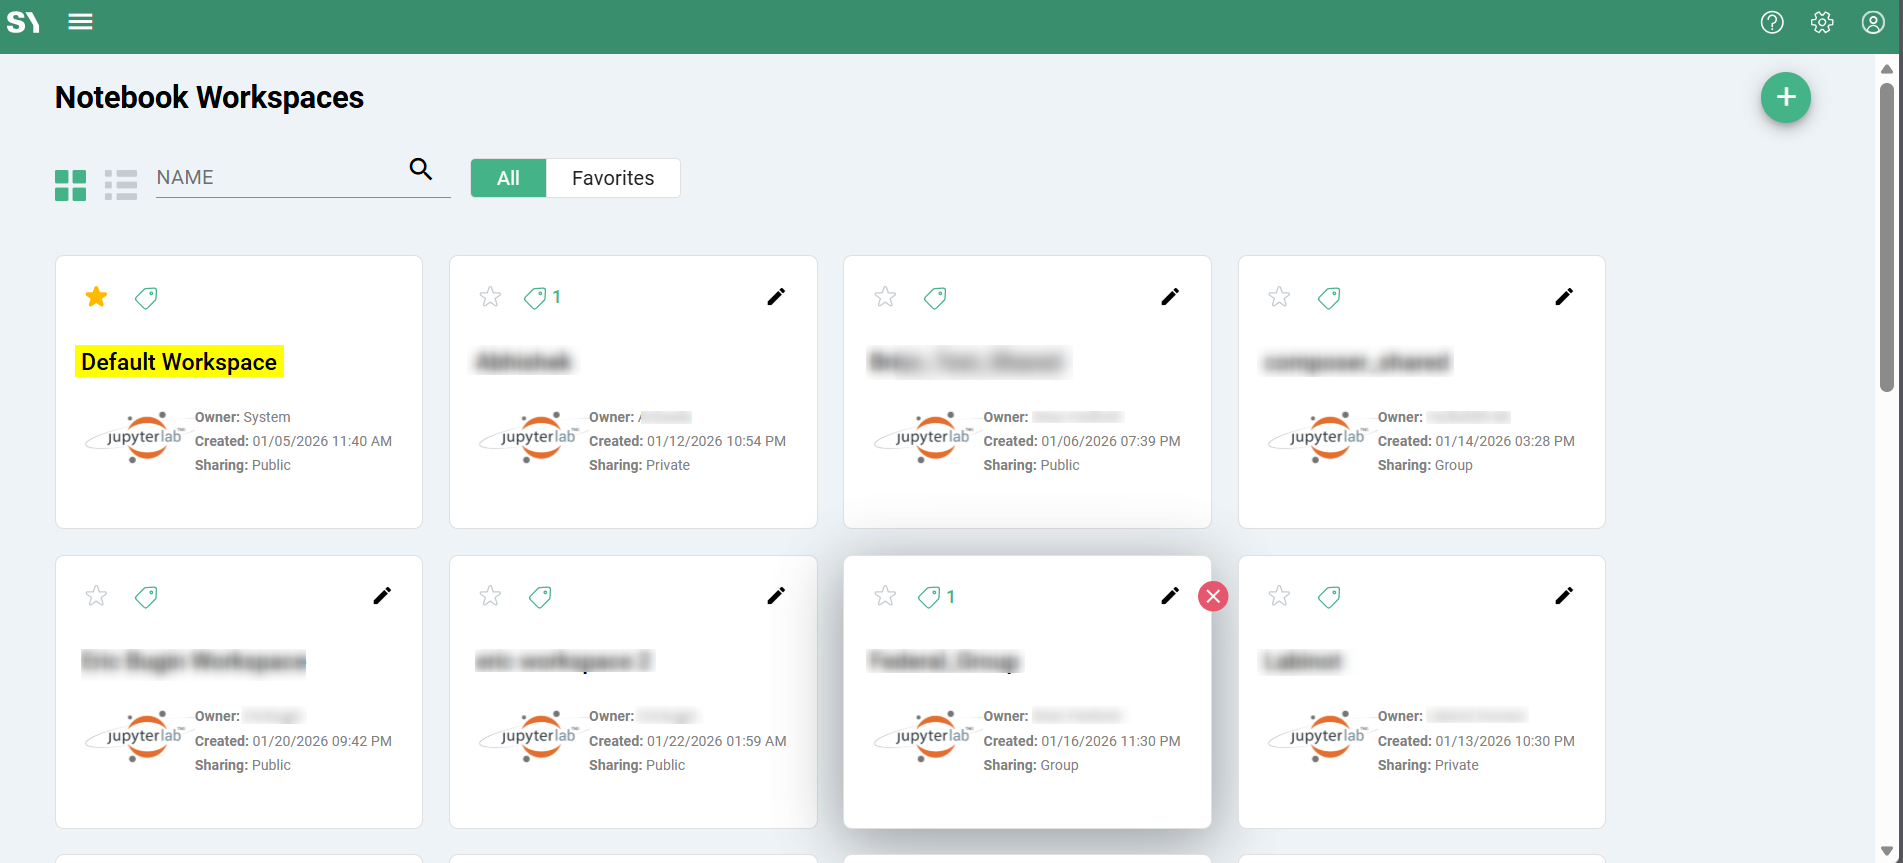
Default Workspace and Migration
When Notebook Workspaces are introduced in environment:
- Syntasa automatically creates a workspace named Default Workspace
- All existing Syntasa notebooks are migrated into this workspace
- No user action is required
- No data is lost
The Default Workspace ensures backward compatibility and serves as the initial entry point for existing users. For system integrity reasons, it cannot be edited or deleted.
Workspace Folder Structure
Each workspace follows a standardized folder layout to balance collaboration with privacy:
shared/
<username>/
shared/
- Visible and editable by all workspace members
- Designed for team collaboration
- Supports real-time multi-user editing and shared execution
<username>/
- Private folder for each user
- Only accessible by the owner
- Ideal for drafts, experiments, and personal work

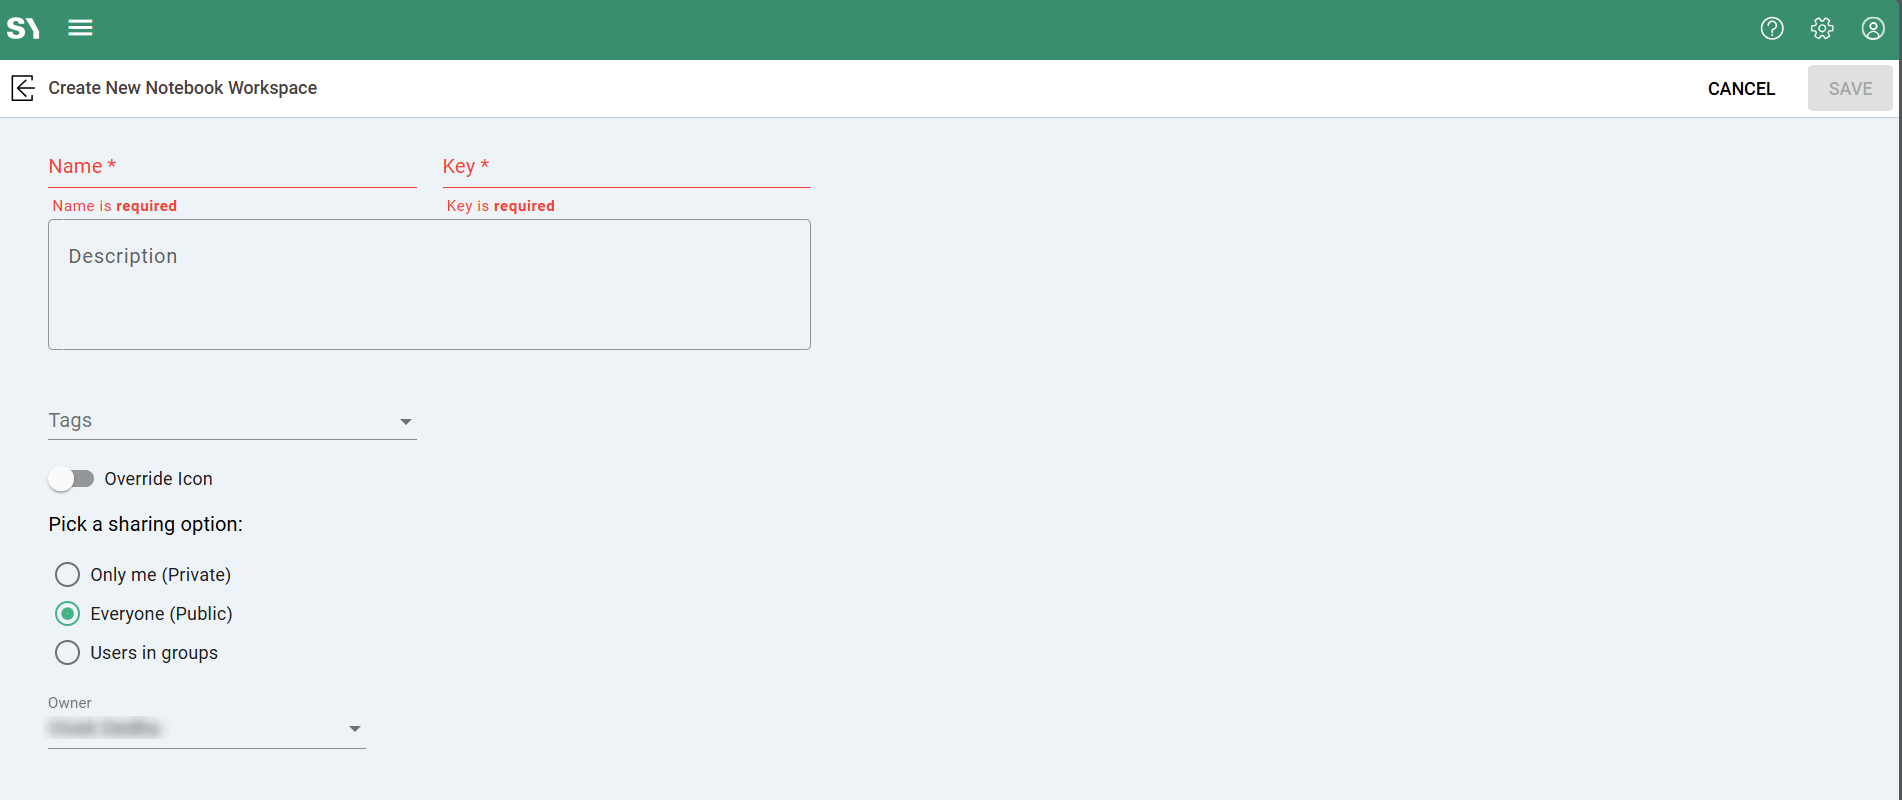
Creating a New Workspace
To create a workspace:
- Open Notebook Workspaces
- Click + Add
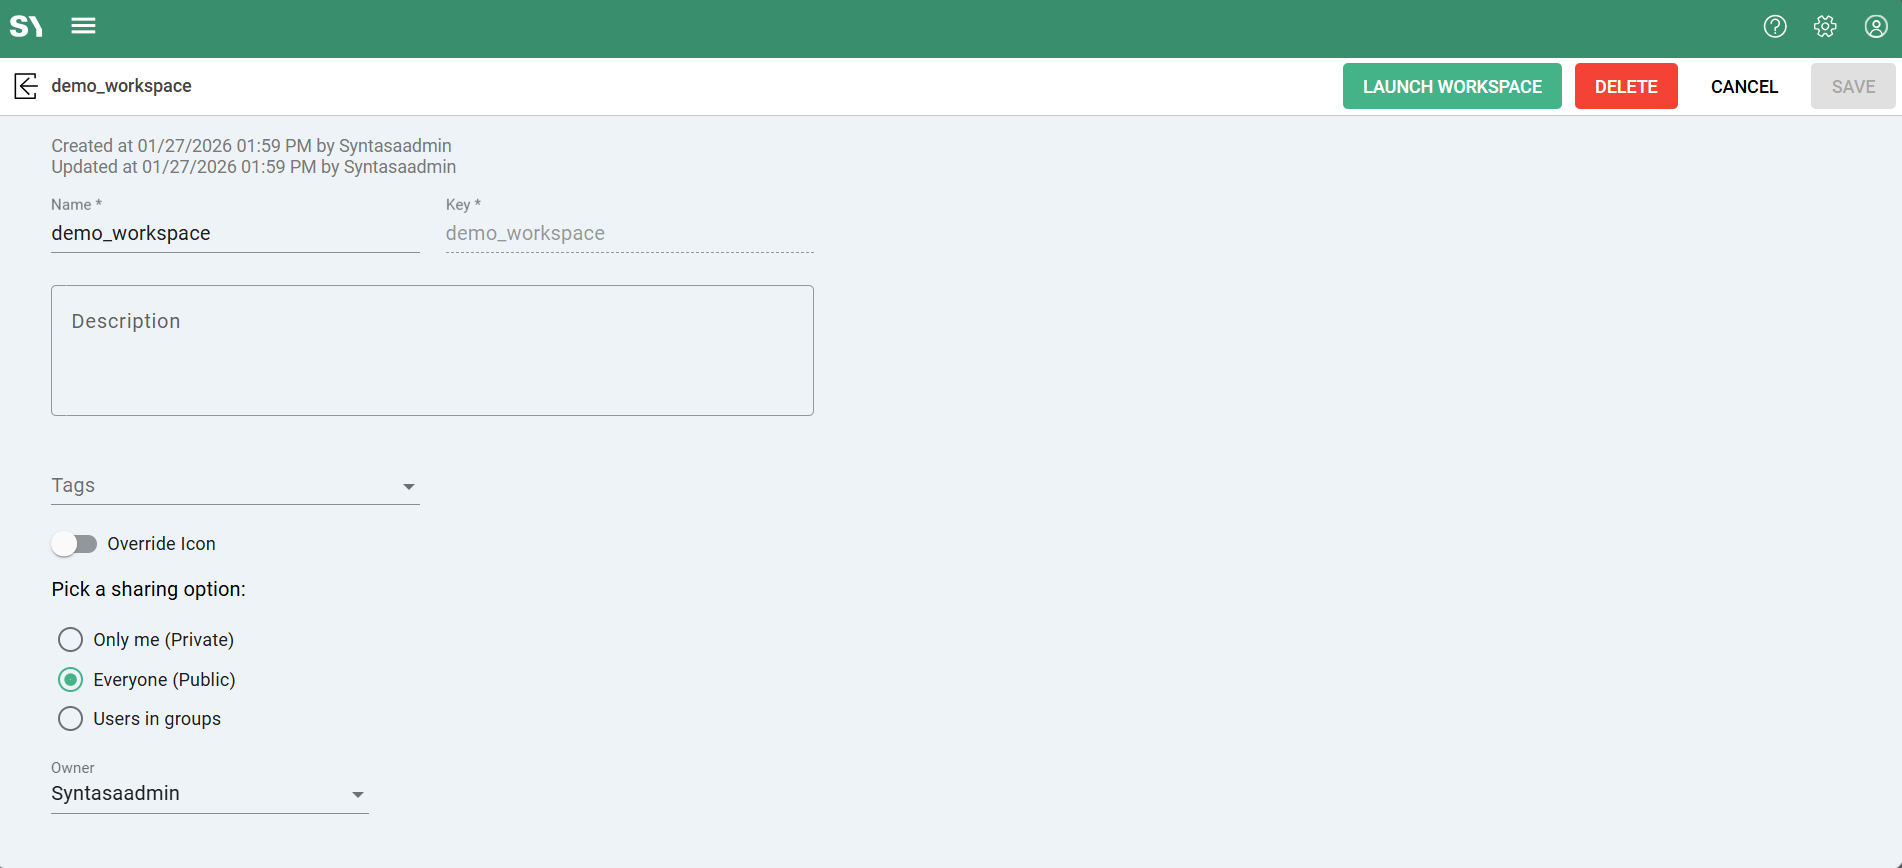
- Complete the form:
| Field | Description |
|---|---|
| Name | Business-friendly name (must be unique) |
| Key | Auto-generated identifier (immutable) |
| Description | Optional workspace purpose |
| Tags | Used for filtering and organization |
| Icon | Optional visual identifier |
| Sharing | Private / Shared (groups) / Public |
| Owner | Defaults to creator (admins can reassign) |
The system automatically validates duplicate names before creation.
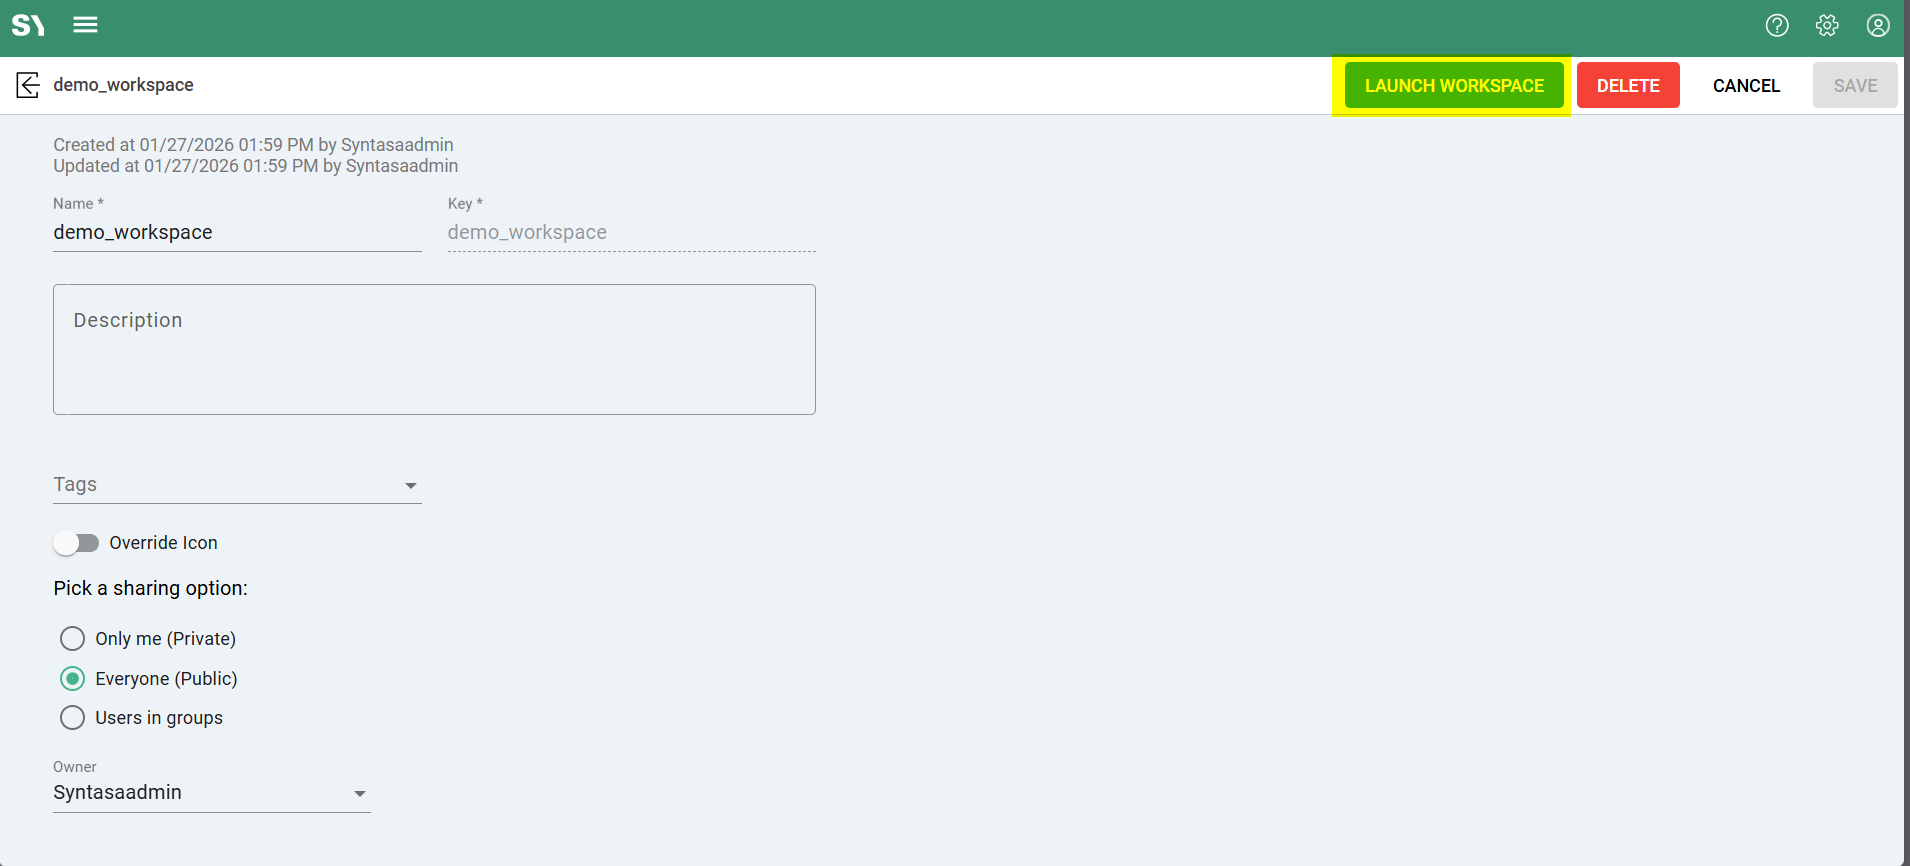
Editing and Deleting Workspaces
Editing
You can update:
- Name
- Description
- Tags
- Sharing configuration
Note: The Default Workspace cannot be edited.
Deleting
Before deletion, Syntasa verifies that no active notebooks remain in the workspace. If notebooks exist, they must be moved or removed first.
To prevent accidental data loss, deletion follows a soft-delete approach, preserving underlying files while removing the workspace from the UI.
Launching a Workspace
Click Launch Workspace from the listing or workspace detail view to open JupyterLab in a new browser tab.
Collaboration Behavior
- All users share the same server instance
- Changes in the shared/ folder appear instantly to others
- Kernel state is shared across users
Creating and Managing Syntasa Notebooks (CardView)
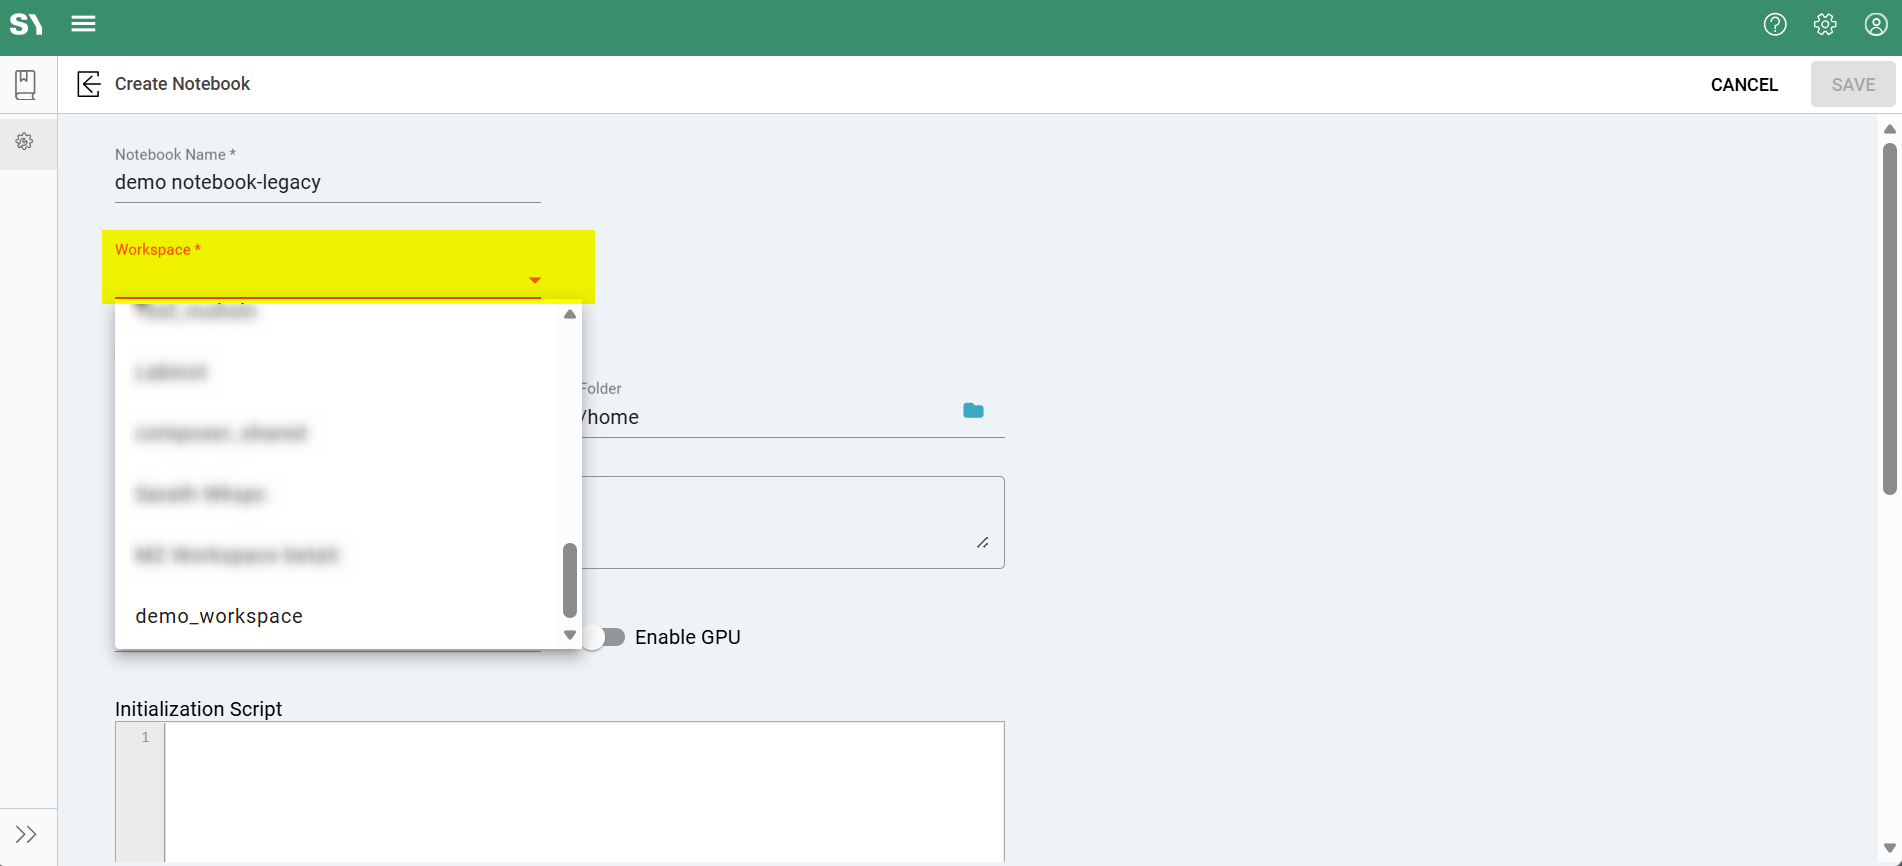
Creating New Notebooks
When creating a Syntasa notebook via card, you must select the workspace where it will reside.
Existing Notebooks
- All existing legacy notebooks (prior to 9.0) are available in the Default Workspace
- Notebooks can be copied between workspaces
- .ipynb files can be imported directly
Using Notebooks in Workflows
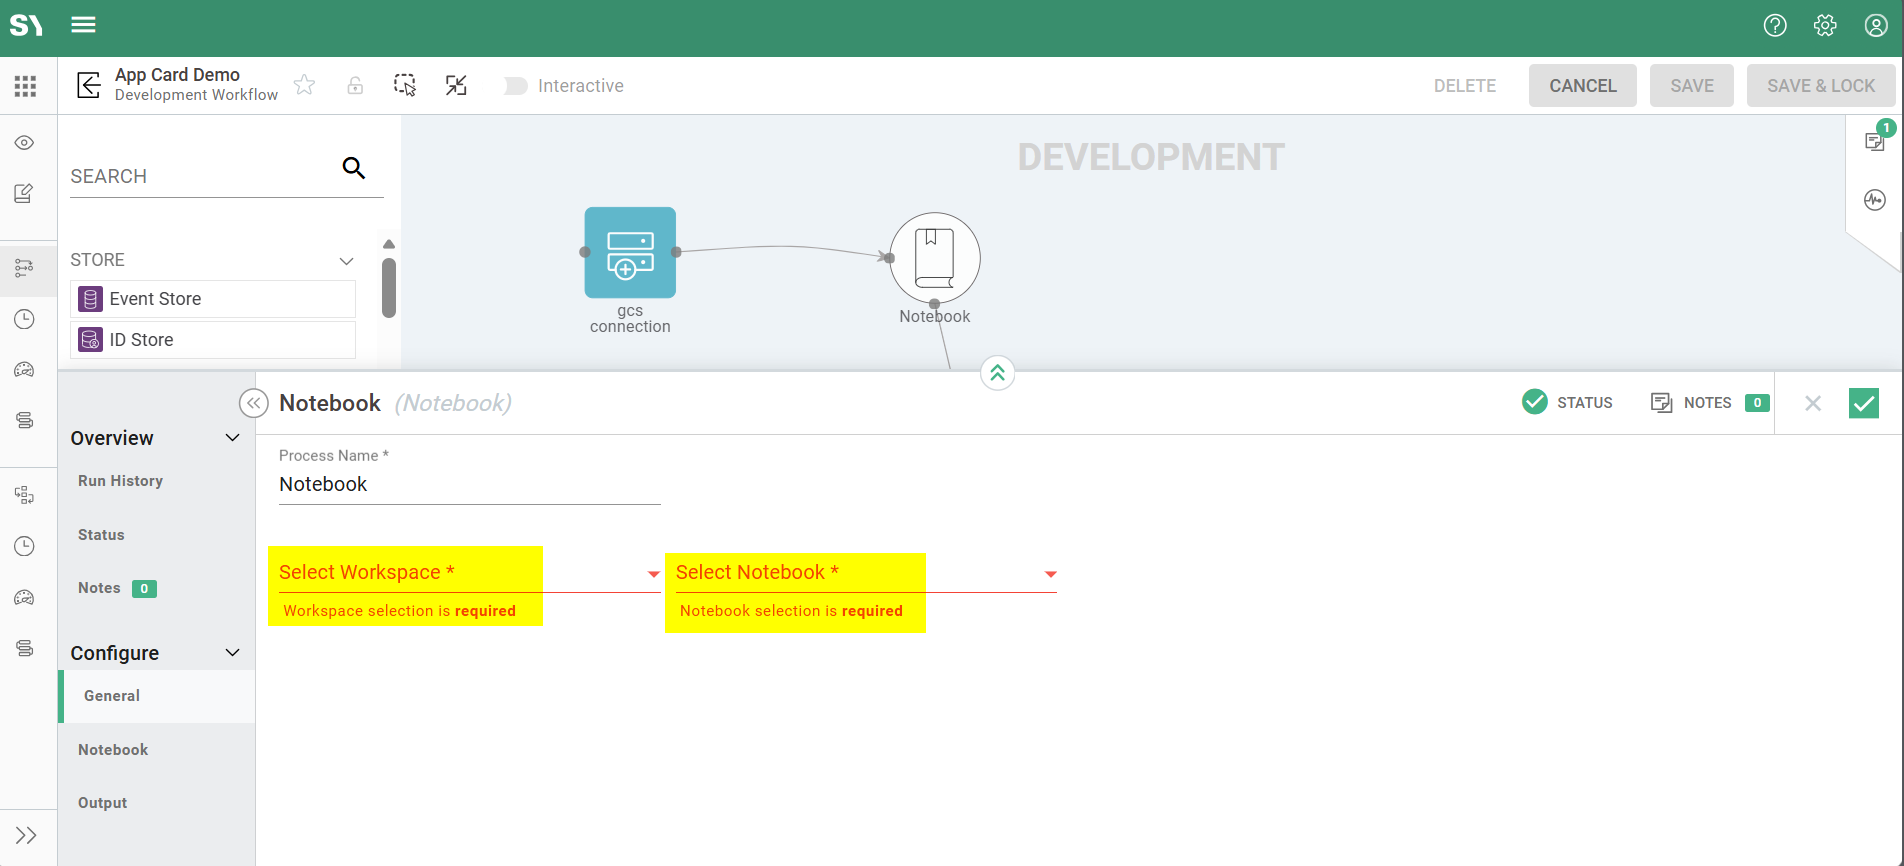
Notebook Workspaces are fully integrated with Syntasa app Workflows.
When configuring a Notebook process node:
- Select the workspace
- Select the notebook
- Preview cells and outputs directly in the configuration panel
- Define runtime parameters
Parameter Handling
- System and user parameters are passed automatically
- The @ prefix is handled internally for Python and Scala compatibility
This allows teams to operationalize notebooks as production workflow steps.
Key Benefits
| Benefit | Description |
|---|---|
| Real-time collaboration | Multiple users work simultaneously |
| Project organization | Separate environments per team or project |
| Access control | Workspace-level security |
| Scalability | Shared server architecture |
| Production readiness | Native workflow integration |
| Backward compatibility | Automatic migration of existing notebooks |
Best Practices
- Use shared/ for finalized team notebooks
- Use users/ for experimentation
- Create separate workspaces for production, staging, and research
- Apply group-based sharing instead of public access when possible
- Tag workspaces by project or department